Today, after spending nearly 3 hours to configure the Client Certificate Mapping Authentication method on IIS for one of project, I decided to write this post to explain how IIS works on client certificate-based authentication and which steps need to be performed to establish a client-based SSL connection.
The <iisClientCertificateMappingAuthentication> element of the <authentication> element specifies the settings for Client Certificate Mapping authentication using IIS.
There are two different methods used on IIS:
One-To-One Mappings: Each client certificate is mapped to a user account. Each user needs a certificate and also each certificate will be used by only one user account. If you have a limited user group and you need to separate them, this option will be suitable.
Many-To-One Mappings: Multiple certificates to a user account. If you are a part of an organization and you need to give access for all users under this organization then this option can be used.

Requirements:
-
IIS Installation (Version tested: 8.5)
-
SSL Server Certificate — PFX →We need this certificate to manage SSL traffics between client and server.
-
SSL Client Certificate — PFX →We will use this certificate for client certificate authentication mapping methods.
-
Already defined Sites for a test (on my test it will be “new”)
-
IIS site that we need to access. We will bind 443 port to this side.
-
Windows Operating Systems
Step 1: Change Web site configuration to ask client certificate
Open IIS Manager > Sites > Your Site > SSL Settings >Double Click
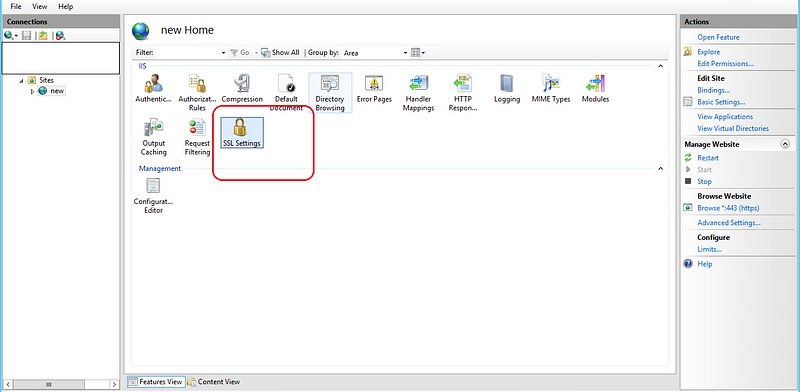
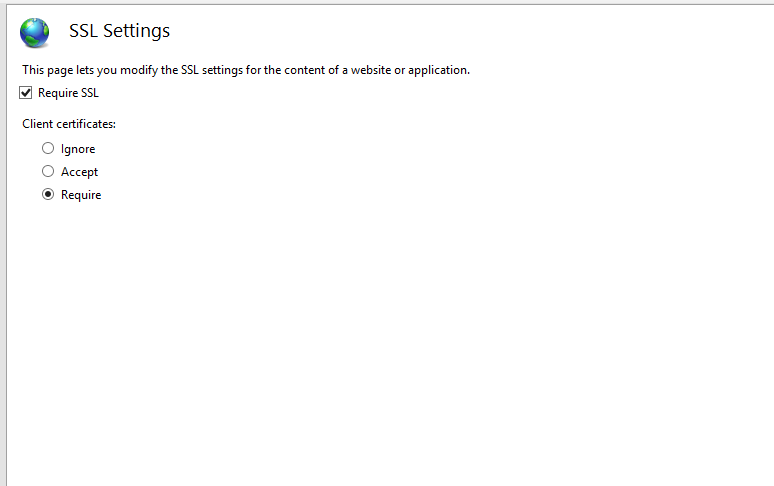
You need to change SSL settings from ignoring to Require.
Step 2: Check your certificate
You should check the server and client-side certificates. Windows asks for PFX format but if you want to make a connection test on Linux you just need private and public keys. I will explain for Windows servers. So at this post, we will perform all steps with PFX and BASE-64 certificate files.
Step 3: Create a user account
You need to create a user account that used to access the directory of your web sites. It also needs to give permission to access this directory.
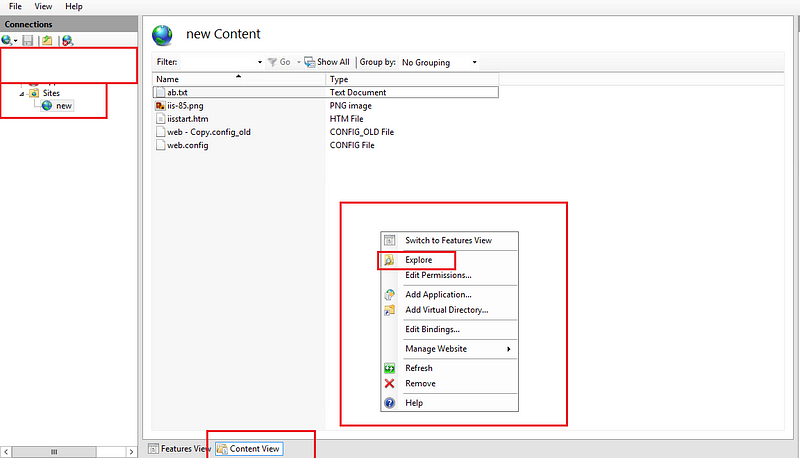
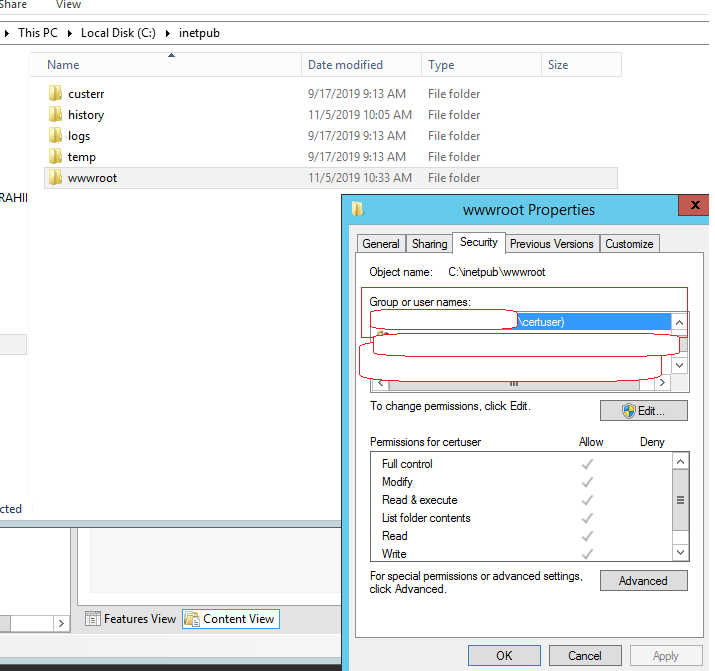
Step 4: Install Certificate to the Server
At this step, we will install the client and server certificates to the trusted store Authorities location.
Client-side Certificate Installation :
Login Client computer > Double Click Client PFX File >Certificate Import Wizard > Select Current User > Next > Type PFX password > Place all .. > Browse > Personal > OK
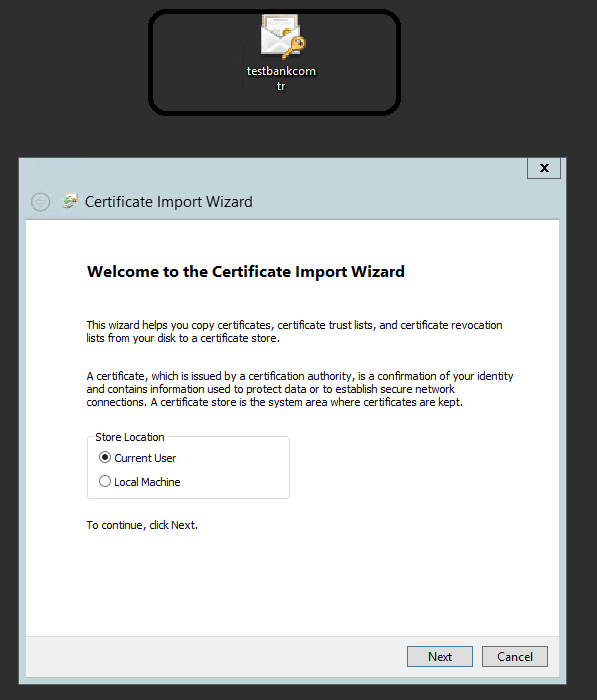
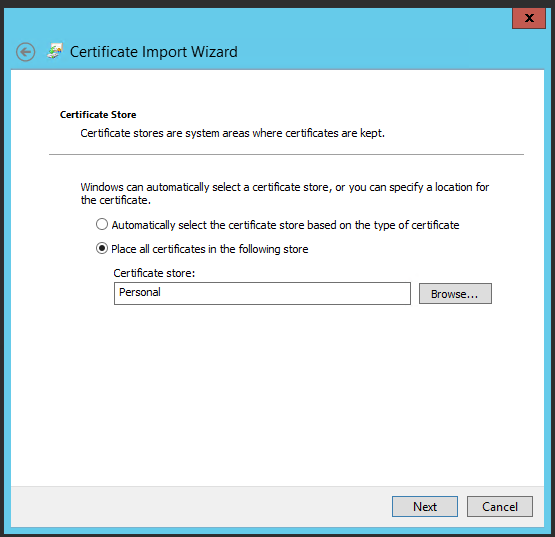
Client-side Certificate Installation :
First of all, you need to install the server certificate for the IIS. Use the IIS manager and import server.pfx file. We will use this certificate to server 443 SSL port.
IIS Manager > Server Certificate > Right Click > Import > Chose PFX > Type password > OK
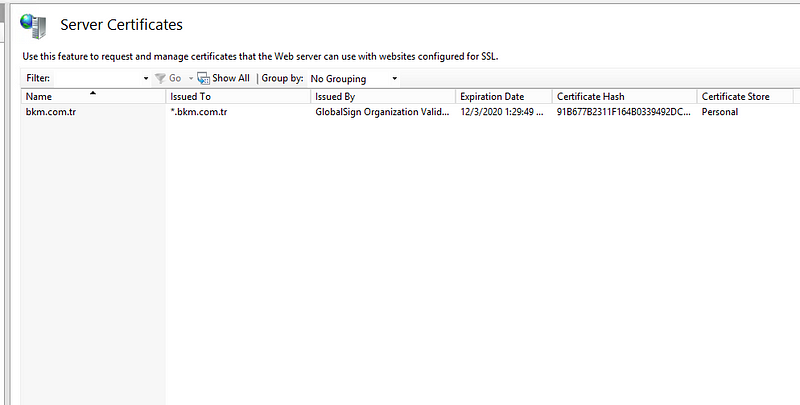
Optional: Add Intermediate and ROOT CA to the trusted store authorities location of the web server. Use MMC > File > Add/Remove Snap > Certificates > Computer Account
Then you need to get Intermediate and ROOT CA from your certificate provider. If it’s self-signed certificate then add only ROOT certificate “Trusted Root Certification Authorities”
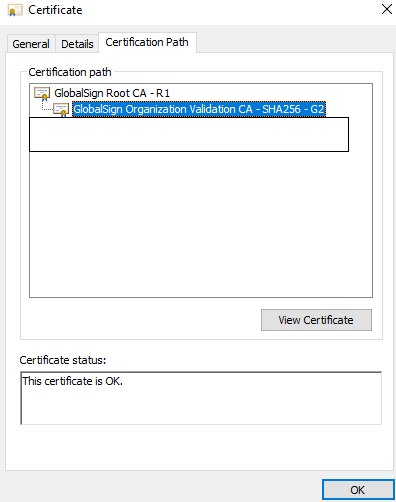
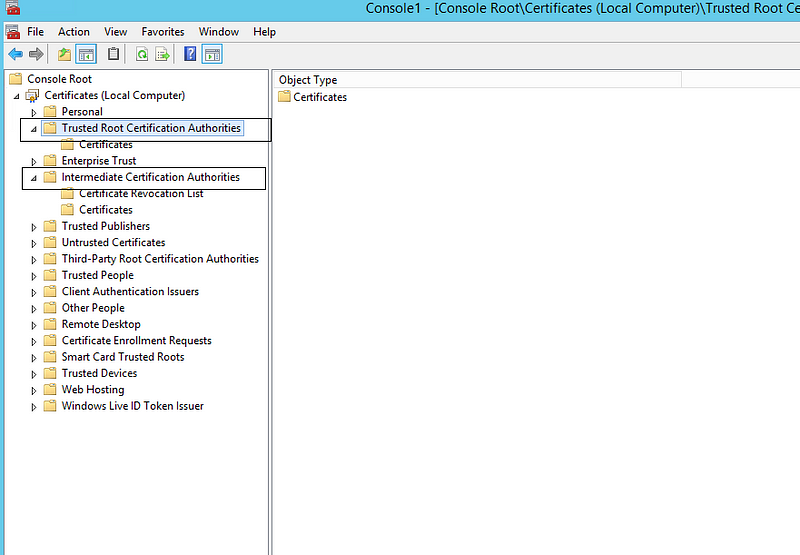
At the end of this operation we set these two configurations:
-
We defined a client certificate to use on the web browser
-
We defined a server certificate to use on the webserver to make traffic SSL . (HTTPS connection)
Step 5: Check If Trusted certificates defined properly
Control 1:
Check if the client certificate’s ROOT CA stored in the Trusted Root Certification Authorities on the Web server.
Control 2:
To identify all non–self-signed certificates in the Trusted Root Certification Authorities certificate store, run as administrator the following PowerShell command:
Get-Childitem cert:\LocalMachine\root -Recurse | Where-Object {$_.Issuer -ne $_.Subject} | Format-List * | Out-File “c:\computer_filtered.txt”
Step 6: Configure IIS for Client Certificate Mapping Authentication
a-Disable Anonymouse Authentication
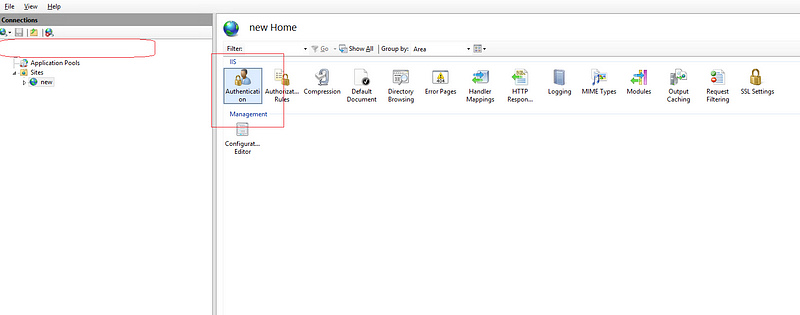
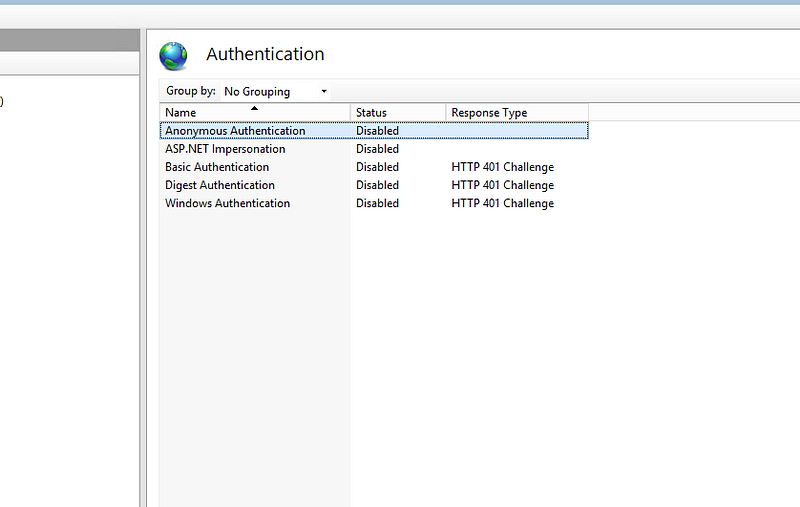
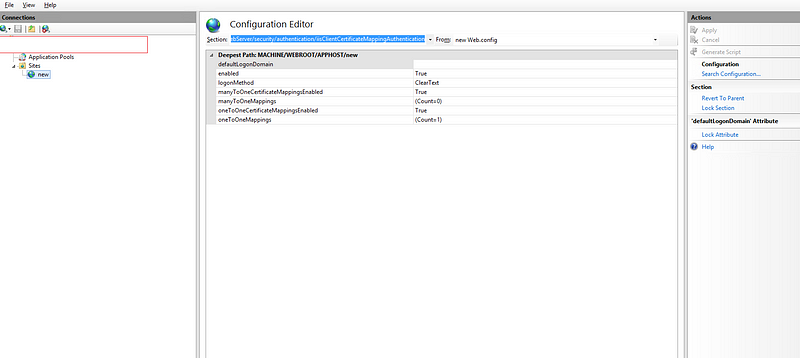
b-change web server mapping Configuration on IIS
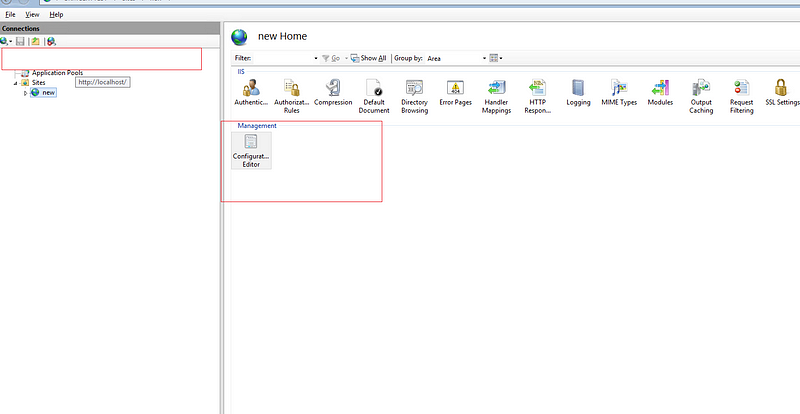
-
On Section put system.webServer/security/authentication/iisClientCertificateMappingAuthentication
-
Change enable to True
-
Change oneToOneMappingsEnabled to True
-
Click on oneToOneMappings
c-Define client certificate and user information
You need to export client.crt file from client.pfx that you imported on personel certificate store at step 4. Just use MMC and export client certificate.
MMC > Add/Remove Snap.. > My Account > Certificate > Personal > Right Click certificate > Open and then export BASE-64.
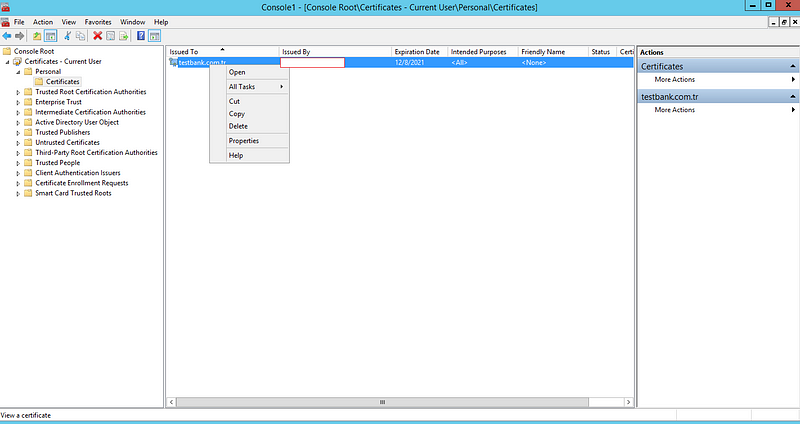
Open the client.cer file that you exported using Windows Notepad:
-
Remove “ — — -BEGIN CERTIFICATE — — -” from the start of the text.
-
Remove “ — — -END CERTIFICATE — — -” from the end of the text.
-
Concatenate all the lines into a single line of text — this is the Base-64 encoded certificate data that you will use for all of the samples in this topic.
-
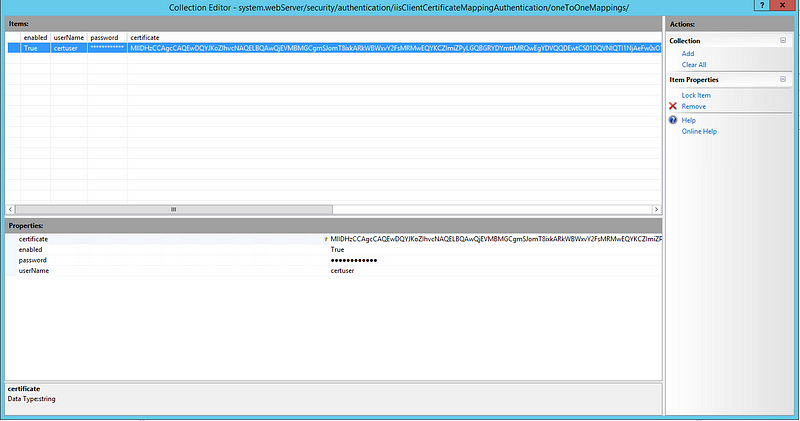
Web configuration file after defining configuration:
<?xml version="1.0" encoding="UTF-8"?>
<configuration>
	<system.webServer>
      <security>
         <authentication>
            <iisClientCertificateMappingAuthentication enabled="true" oneToOneCertificateMappingsEnabled="true">
               <oneToOneMappings>
                        <clear />
                        <add userName="certuser" password="[enc:AesProvider:VyAp+Q3JO98mhFpL6N+o0NeJFG9g2sGNP5kWJb5Bm5jnpO8dBwa5K+nQiLh1zoeY:enc]" certificate="BASE-64-Cert" />
               </oneToOneMappings>
            </iisClientCertificateMappingAuthentication>
         </authentication>
      </security>
	</system.webServer>
</configuration>
That’s all. Apply changes and then test client certificate with web browser or Openssl.
#openssl s_client -cert testcom.crt -key testcom.key -connect <IP>:443
Key-Arg : None
 Krb5 Principal: None
 PSK identity: None
 PSK identity hint: None
 Start Time: 1572942846
 Timeout : 300 (sec)
 Verify return code: 0 (ok)
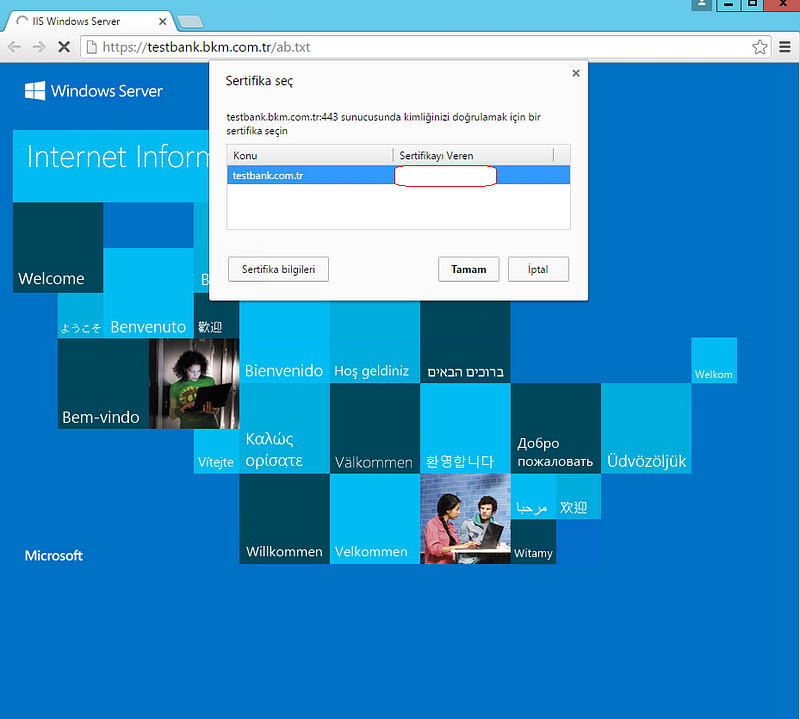

Thinks that can go wrong:
403 forbidden error: Related to certificate and Trusted root certificate issues . So you need to focus on MMC steps and also check client certificate defined properly.
Incorrect Username Password : This type of error will return error code “ 0x8007052e” . If you got this error on page then you should check user and password that you defined in configuration steps that 6-b.
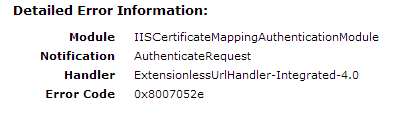
BASE-64 Certificate Issues: If you got an error codes like “ 0x80093102” and “ 0x8009310b” that means you didn’t define client certificate BASE-64 format and Concatenate all the lines into a single line of text. Check client certificate and be sure you added all the lines into a single line of text.
{{search404Captions.content404Title}}
Edit descriptionsupport.microsoft.com
{{search404Captions.content404Title}}
Edit descriptionsupport.microsoft.com

